Golf tips, instruction, and commentary for any golfer looking to improve.

Category: Golf Tips Page 1 of 6

Frustrated golfer

Common Golf Swing Mistakes and How to Fix Them

A great golf swing looks effortless but even experienced players struggle with small golf swing mistakes that throw off their shots. The good news? Most mistakes have simple fixes. With a few adjustments, you can hit the ball cleaner, straighter, and with more confidence.

Below are some of the most common golf swing mistakes and easy ways to correct them.

The Death Grip – Holding the Club Too Tight

The first golf swing mistake is gripping the club too tightly creating tension in your arms and wrists and making it harder to swing freely. Many golfers squeeze the club as if they’re holding on for dear life, thinking it gives them more control. In reality, it does the opposite.

  • Fix: Hold the club with a firm but relaxed grip. A good test is to grip it as if you’re holding a tube of toothpaste without squeezing any out. A lighter grip helps create a smoother, more natural swing.
  • Drill to Try: Before taking a shot, shake your hands to release tension. Then, grip the club with enough pressure to maintain control, but not so much that your hands feel stiff.

Poor Posture – Slouching or Standing Too Tall

Another golf swing mistake is forgetting to set your posture for your swing. If you’re hunched over, you’ll restrict your turn. If you stand too tall, you’ll lose balance and power.

  • Fix: Stand with a slight bend at your hips, keeping your back straight and arms hanging naturally. Think of an athletic stance, like a basketball player getting ready to move.
  • Drill to Try: Stand in front of a mirror, place a club across your shoulders, and practice tilting forward from your hips without bending your back. This helps you find the right posture for a powerful, balanced swing.

Over-Swinging – Trying to Crush the Ball

It’s tempting to swing as hard as possible, thinking it will send the ball farther. In reality, overswinging usually leads to off-center hits and a loss of control.

  • Fix: Focus on smooth rhythm instead of power. A controlled, balanced swing produces better contact and more consistent distance.
  • Drill to Try: Try hitting 10 shots at just 50% of your usual power. You’ll be surprised at how solid your contact feels, and over time, your full-speed swings will feel more controlled.

Slicing – The Ball Curves to the Right (for Right-Handed Golfers)

A slice is one of the most common swing issues. It happens when the clubface is open at impact, causing the ball to spin right. This often comes from a weak grip or an outside-to-inside swing path.

  • Fix: Strengthen your grip slightly so your lead hand (left hand for right-handed golfers) shows two or three knuckles. Also, work on swinging from inside the target line.
  • Drill to Try: Set up two tees just outside your ball, creating a “gate”. Practice swinging through the gate without hitting the tees. This encourages an inside-out swing path, helping to reduce your slice.

Hooking – The Ball Curves Too Much to the Left

A hook happens when the clubface is too closed at impact, usually from over-rotating your hands.

  • Fix: Keep your grip neutral and avoid flipping your wrists too early in the swing. Focus on keeping your hands steady through impact.
  • Drill to Try: Hold the club with your normal grip, but before swinging, check your knuckles. If you see too many on your lead hand, slightly weaken your grip to help keep the clubface neutral at impact.

Lifting Your Head Too Early

Many golfers peek up too soon to see where the ball is going, causing them to top the shot or miss it completely.

  • Fix: Keep your eyes on the ball until after contact. Let your shoulder pull your head up naturally instead of forcing it.
  • Drill to Try: Place a coin under the ball and focus on the coin instead of the ball itself. This keeps your head down longer and prevents early movement.

Losing Balance During the Swing

Another golf swing mistake is swaying too much or falling back after your shot which leads to inconsistent contact.

  • Fix: Stay centered over the ball and transfer your weight smoothly from your back foot to your front foot. Your finish should feel controlled, not off-balance.
  • Drill to Try: Practice swinging with your feet close together. This forces you to maintain balance and avoid excessive movement.

Mindset and Practice Habits Matter Too

Even with the best swing mechanics, inconsistency can come from rushing shots, second-guessing your technique, or overthinking. The best golfers stay relaxed and focus on one simple thought before swinging.

Fix: Before each shot, take a deep breath and pick a small target to focus on. A clear mind leads to a smoother swing.

Final Thoughts

Fixing your golf swing doesn’t mean changing everything overnight. Small, steady improvements lead to better consistency and lower scores. Work on one issue at a time, be patient, and soon you’ll start seeing results on the course.

If any of these mistakes sound familiar, pick one to focus on and practice the drills. Golf is all about small adjustments that add up over time. Keep at it, and your swing will feel more natural and reliable in no time.

About the Author:

Daniel is a passionate golf writer and enthusiast who loves helping players improve their game. He shares practical tips, drills, and expert insights at Matt Guides. When he’s not writing, you’ll find him fine-tuning his swing on the course.
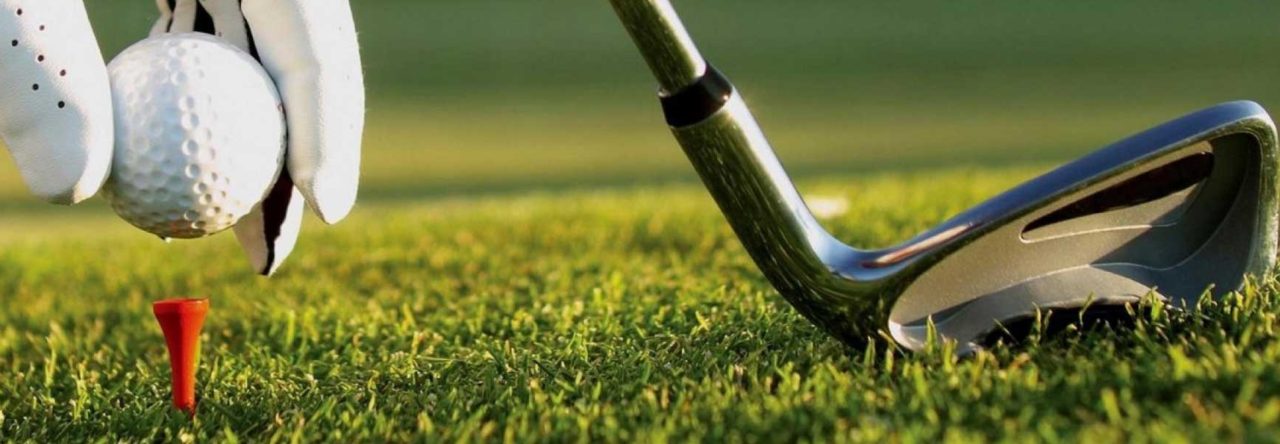
How to Find the Perfect Golf Tees to Play From?

Right before you step onto the first tee you’re immediately faced with make-or-break decision for your round. What golf tees should you play from?

On one hand, playing from tees too short can make the game too easy or limit the variety of shots you hit. On the other hand, however, playing from tees that are too long can make the game too hard or frustrating.

So which tees should we be playing from?

The Golf Academy has teamed up with Francesco at My Golf Heaven to help provide you that answer. 

Which golf tee box should you play? 

Terms like senior tees or lady tees might give the impression they are only suited for seniors and lady golfers. That reputation is undeserved, in our opinion! Forget your ego and hitting more greens by playing shorter irons on your approach shot. 

There are different methods to figure out which tee box you should play. We’ll be looking at the two most popular ones.

Preferred method

Use the data provided by the PGA and USGA forward tee initiative. This initiative serves to educate recreational golfers to play from the correct tee box, based on their driving distance. Here’s a table for reference:

Driving Distance Recommended Course Length
PGA Tour Pros 7,600 – 7,900 Yards
300 Yards 7,150 – 7,400 Yards
275 Yards 6,700 – 6,900 Yards
250 Yards 6,200 – 6,400 Yards
225 Yards 5,800 – 6,000 Yards
200 Yards 5,200 – 5,400 Yards
175 Yards 4,400 – 4,600 Yards
150 Yards 3,500 – 3,700 Yards
125 Yards 2,800 – 3,000 Yards
100 Yards 2,100 – 2,300 Yards

The idea here is to leave you an approach shot of no more than 170 yards on Par 4 holes. You might be surprised at these numbers. Considering that the average driving distance of a male amateur golfer is 225 yards, we can assume that most people should play the more forward tees. 

Having fewer yards into the green allows you to play shorter irons. These usually are easier to hit, and you’ll be more accurate. 

Other methods

Another popular method to calculate which tee box you should use is to multiply your driving distance by 28. That gives you a rough estimate of the course length best suited for your game.

While this method works, it’s not always the most accurate. Another valuable option to the data provided above, is to look at the average distance you hit a 5-Iron.

Here how to pick a tee box based on your 5-Iron distance:

5-Iron Distance Recommended Course Lenght
200 Yards 7,200 Yards
190 Yards 6,840 Yards
180 Yards 6,480 Yards
170 Yards 6,120 Yards
160 Yards 5,760 Yards
150 Yards 5,400 Yards
140 Yards 5,040 Yards
130 Yards 4,680 Yards
120 Yards 4,320 Yards
110 Yards 3,960 Yards
100 Yards 3,600 Yards

Similar to before, you might recognize that the usual tees you play are a bit too long for you.

What clubs should you use to tee off? 

Again, Francesco recommends you should leave yourself an approach shot of 170 yards or under into the green. Based on that and the hole’s layout, you’ll decide whether you should use a driver, 3-Wood, or an Iron off the tee. 

Many golfers automatically default to the big stick on every hole. But the length of the hole is not the only thing that’s important for scoring well. Being accurate often trumps hitting it long, but in the rough (or worse). 

Accuracy and ball-striking off of the tee have always been critical parts of scoring well and both of us agree that missing the fairway is one of the most common ways golfers throw away strokes on the course.

The benefit from playing off the correct golf tees

The PGA & USGA forward tee initiative surveyed recreational golfers after changing to their correct tee box. Here are the results. 

  • 56% of golfers played faster
  • 56% are likely to play golf more often
  • 83% hit higher-lofted clubs into greens
  • 85% had more fun
  • 93% decided to tee it forward again

The numbers don’t lie! Give it a try and enjoy your next round of golf even more by playing from the correct tee boxes!

We are sure you’ll have an enjoyable experience and a score lower. If you do, let us know down below in the comment section. And if you’re interested in reading more tips from My Golf Heaven, click here. 

2 Unique Putting Drills for a Confident and Pure Putting Stroke

Putting. The one area of golf where strokes start to add up fast.

Lag one 15ft past the hole? No chance of making par with a three-putt. Or maybe you’ve lipped out one of those knee-shaking 3-footers? Even tour pros have a hard time shaking that off before they tee on up on the next hole.

So what is the reason golfers of all ages and skill levels make these mistakes? Well, there are two very simple yet hard to fix reasons. That is unless you know what to work on…

Reason 1: Poor Ball Striking

The first reason golfers struggle with putting is poor ball striking.

Why is this such a big deal? Simple – if you can’t strike the ball both purely and consistently nothing else about your putting game matters. You could have the perfect line but if you dig the club into the green before contact or blade your putts the ball will never make it to the cup anyways.

Additionally, if you don’t strike the ball well, it’s impossible to discover how hard you need to strike a putt for a given distance. And if you have not idea how hard to hit a putt, you’ll be doomed to lipping out 3-footers or lagging the ball off the green forever.

So what drill can we do to improve the ball striking on our putts? Fortunately, it’s really a very simple drill:

How Many Degrees is a Sand Wedge // Explained in Detail [2019 Update]

Drill One – Putt with your Wedge:

Now before you think I’m crazy, hear me out. There are a couple of benefits of practicing with a wedge, both physically and mentally, that will make you a better putter. Here’s why you should give it a try.

Less margin of error – instant feedback:

  • To putt well with a wedge you have to strike the center or equator of the golf ball perfectly with the leading edge of the club. Any miss with your wedge will result in a pop-up/top of the ball or a hollow feeling if you hit the ball off the heel or toe of the club.

Promotes a softer putting grip:

  • Many golfers struggle with a vice grip on their putter – especially when it comes to knee-shaking 3-4 footers. This causes players to lose their “feel” with the putter and over-exaggerates small wrist movements which can change the direction of a putt.  Using a wedge fixes this problem by simply giving the mind something else to focus on. Instead of worrying about missing a putt or stabbing at it, your mind can focus on how weird it is to putt with an iron. The result is a relaxed demeanor (which causes a softer grip) and an emphasis on stroking the putt with your shoulders (instead of your wrists)

It makes you miss your putter:

  • The beautiful thing about this drill is that it’s all about resetting your mind. Nothing about putting with a wedge is about technique; you can use any stance, grip, or putting motion you want and this will make you hit purer putts. Probably the best part about the entire drill is that putting with a wedge is hard… It’s so hard in fact, that once you start hitting putts you’ll miss having your old putter back. Picking up a club that gives you confidence is one of the best ways to hit a great shot, and after putting with a wedge for half an hour, picking up a putter will feel like night and day.

So there’s our first step to pure putting, grab a wedge or 9-iron and start in on the putting green. It won’t take long for you to start regaining your putting mojo.

Next up is another drill that works regardless of a player’s putting technique. Let’s talk about:

Drill Two – The Steel Ruler Drill:

steel ruler drill

Our second putting drill today is, as you may have guessed, the steel ruler drill. This drill places your ball on top of a steel ruler close to the hole with the objective of forcing the golfer to strike the ball squarely. Here’s how the drill works:

  • Place a steel ruler on a flat surface of putting green, roughly 3-5ft from the hole.
  • Place your ball on the far end of the ruler and take your normal golf stroke.
    • If the ball stays on the ruler all the way to the hole, you’ve hit a straight one. If not, your putting stroke needs some extra work.

Why It Works

The Steel Ruler Drill is great for two reasons. First, this drill provides instant and visual feedback on your last stroke with all extra variables, besides your putting stroke, removed.

On the course, it’s easy to chalk up a missed putt to a bad read, wind, green speeds, or any other number of things. This is a problem because often times the reason we miss putts in because we simply miss-hit the ball and place in along the wrong path towards the hole.

This leads to the second valuable part of this drill; it makes improvement simple and measurable. While you could plop down 10 balls and make 8 of them in the hole, you’ll never know what caused the two misses or even in the 8 makes were well executed or just lucky breaks.

With the steel ruler, you are only measuring if the ball travels across the ruler to the hole, nothing else. And if it doesn’t then you know either your swing plane is crooked or your clubface is not square at contact.

Either way, hitting 10/10 putts straight along the ruler will definitely ensure that your putts start out on the right line. The additional confidence from knowing you have a pure stroke is just an added bonus.

Once you have that covered, it all comes down to correctly reading a greens break; something that every golfer improves on given time and practice.

The Wrap-Up

So there it is, two unique putting drills to help refine your golfing fundamentals. While wedge putting and the steel ruler may seem like simple gimmicks, the unique nature of the drills is the reason they work so well.

Golfers are full of thoughts that constantly try to talk them into bad shots. By giving your mind something totally different to feel and focus on, you give your body the chance to stroke solid putts, build up muscle memory for your swing, and most importantly, gain confidence in your putter and putting stroke.

This simple boost of confidence of being able to feel a well-struck putt or trust that your swing will set the ball down the line you’ve chosen is the most important step you can make to improving your putting.

So take some time on the practice green or in your living room and play around with these two unique golf drills. I know that a couple of hours with the wedge or rolling the ball on the ruler are going to lead to successful, and more importantly, enjoyable rounds for you.

How to get Backspin on Your Ball: Attacking the Pin like a Pro

We’ve all seen it; a pro golfer flies their approach shot 15-20 feet past the cup only to spin the ball all the way back. While we might only see this on television, in reality, getting backspin on your approach shots is something that any golfer can do with a little technique and some practice.

So, let’s spend today talking about how you can add backspin into your approach game repertoire.

How Does Backspin Even Work?

Backspin has mistified golfers for years by turning very bad shots into nearly perfect ones around the green. So how does this “magic” happen?

In the past, we’ve talked about what causes hooks or slices, however, backspin is a little different.

Where hooks and slices impact your ball’s flight in the air, backspin has to do with what happens to your ball after it lands on the ground. Thankfully, backspin is much easier to understand.

Backspin truly boils down to the spin your swing puts on the ball. After contact is made with the ball, your shot flies through the air spinning backward; in the same way, a basketball shot spins through the air on its way to the hoop.

After your shot lands, this backspin (if it’s powerful enough) will cancel out the balls forward motion and even roll the ball back towards you.

How to Get Backspin on Your Shot

So, with all of the physics behind us, let’s use this basic understanding of golf physics to figure out how we can get backspin on our shots around the green.

Since we just talked about how the backspin from your swing results in backspin when the ball lands, all of our tips will focus on putting the most spin on our approach shot without jeopardizing our distance or accuracy.

Stance

First, let’s talk about the setup. While you would normally stand with the ball in the middle of your stance for an average iron shot, we are going to move the ball back in our stance slightly for this shot.

By moving the ball back in our stance, we force our bodies to take a steeper swing arc during our stroke. This steeper swing arc will result in higher levels of compression on the ball and improved backspin on your shots.

Club Selection

With our stance properly aligned, let’s talk about club selection.

To be most successful spinning the ball back, focus on using the higher lofted clubs in your bag.

Intuitively this should make sense. In order to get backspin, we need to stop the forward movement of the ball and still have some spin left to bring the ball back. By using a lower lofted iron such as a five or six iron we are hitting much flatter, further shots.

This results in more forward momentum and less backspin once the ball lands on the green.

To fix this problem, start practicing with high lofted clubs; I would recommend mastering your backspin with a lob wedge or a sand wedge before you move to 9 or 8 irons.

The Swing

Our final piece of advice for improving your backspin has to do with your swing.

Now, while you absolutely should not be changing your swing dramatically to get more backspin out of your shots, there are a few adjustments you can make to get the most out of your current swing.

First, we need to talk about the angle of your hands. While our setup from above has placed our hands slightly in front of the ball, resist the temptation to amplify this effect my pushing your hands forward, as you would in a bump and run chip.

This can result in a very flat shot which, again, produces too much forward momentum and prevents our shot from spinning back towards the cup once it lands.

Instead, let your hands hang neutral as you normally would. This results in a ‘slightly’ closed clubface from our stance but a very strong grip through contact; something that will translate into higher levels of consistency on your swing and increased levels of spin on the ball.

In addition to neutral hands, focus on placing slightly more weight on your front foot during your setup. This extra weight will help facilitate your weight transfer and ensures that you attack the ball on contact.

One great way to make sure this is happening is to look at the divot your swing leaves after contact. If your divot is in front of the ball’s previous location then you know you properly transferred your weight during the shot.

By doing so, you ensure the club touches the ball before it touches the ground at contact. This will help you put the most spin on your shot while also minimizing errors with your shot’s consistency that can result from hitting the ground first during contact.

What Next?

Now that we’ve laid out information on your stance, club selection, and swing you should be all set to hit the range and try out your newly discovered shot.

While it might not happen overnight, a few weeks of consistent practice and a little bit of experimentation should be all you need to start working on some beautiful, high loft, backspinning shots.

And before you know it, you’ll be attacking the pin just like the pros do on TV.

Left Hand Low: Why the Future of Putting is Cross-Handed

For many golfers, putting is the first part of the game they learned. If you look back at years of mini-golfing as a child it’s easy to see that the technique associated with putting has been ingrained in many of us from an extremely young age.

Here’s the problem with that, however; it’s all wrong.

You see, hitting a putt is not as simple as swinging a baseball bat or a tennis racket. To be a successful putter you need precision, which is something these other sports don’t require as dramatically. So how are we supposed to get the precision needed to score better on the green?

It’s simple, we need to start putting cross-handed.

What is Left-Hand-Low Putting?

Left-hand-low or cross-handed putting is one of golf’s lesser known secrets. Recently made popular by Jordan Speith, this putting method has actually been around for decades. In fact, Jack Nicklaus once said that if he had to teach someone how to putt from scratch, he would start them off cross-handed.

left hand low putting.jpg

For the right-handed golfer, the cross-handed grip is shown above.

So what is cross-hand putting anyways?

Put simply enough, cross-hand putting is simply a reversal in the order of your hands when you grip your club. This led to the phrase “left-hand-low” as right-handed golfers who adopted this technique placed their left hand underneath their right. This can be seen in the picture to the right.

While the set up might seem easy enough, golfer’s such as Jordan Speith, Billy Horschel, and Kevin Chappell have all won tournaments using cross-handed grips in the past few years.

So what is it about putting cross-handed that makes this technique so powerful?

Benefits of Cross-Handed Putting

Let’s be honest, nobody would ever switch up their tried and true putting grip for no reason, right? So there must be something that makes cross-handed putting so powerful.

Well, here are the two reasons you should consider switching to cross-handed putting:

  • taking your dominant hand out of control will make you more accurate
  • switching your hands will align your shoulders and improve your ball-striking

Improved Accuracy

The first area of improvement driven by cross-handed putting is your accuracy. Traditionally, the dominant right hand (for righty golfers) has caused accuracy problems for golfers.

When you strike a putt, the lower of your two hands drives the action in your stroke. While this is very useful for full swings, as your dominant hand is stronger, it is not helpful for shots that require more precision.

By placing your left hand on the bottom of your grip, you are placing this hand in a dominant position. This, in turn, leads to a putt that resembles more of a pull instead of a push and will help prevent unwanted wrist movement at impact.

Shoulder Alignment

In addition to improving the accuracy of your putts, putting cross-handed can also improve your ball striking on the green. How? Well, it all has to do with how your shoulders are aligned.

When you putt “normally”, or with your right hand on the bottom, many golfers have a tendency to favor their right shoulder over their left.

Normally, this shoulder lean is a helpful part of your game. This helps you sweep the ball off of the tee and squeeze every ounce of distance out of your swing. Unfortunately, doing this on the green causes poor contact and, as a result, poor distance control on your putts.

However, by switching to a left-hand-low grip, your body will naturally square up your shoulders. This helps balance the backswing with the fore swing and produces a more pendulum-like stroke; something that is great for distance control and improved touch around the green.

Recap

While switching to a cross-handed putting grip won’t immediately improve your game, I personally believe that the benefits of improved accuracy and ball-striking are worth the practice time required to make the change.

After all, that’s exactly what made me switch to a left-hand-low grip two years ago. Something that has paid dividends for me ever since.

Cross-handed putting might not be right for everybody, but it was right for me. And given the esteemed company that has also switched over to cross-handed putting, there’s no doubt in my mind that left-hand-low is here to stay.


Page 1 of 6

Powered by WordPress & Theme by Anders Norén